Difference between revisions of "RPF Raspberry Pi 4 Model B"
Jump to navigation
Jump to search
Stephen304 (talk | contribs) (Created page with "Category:Raspberry Pi Foundation thumb|Raspberry Pi 4 Model B == Flashing == The Raspberry Pi uses a removable microSD card for st...") |
m (Move materials out of install section) |
||
| (7 intermediate revisions by 3 users not shown) | |||
| Line 1: | Line 1: | ||
| + | [[Category:Devices]] | ||
[[Category:Raspberry Pi Foundation]] | [[Category:Raspberry Pi Foundation]] | ||
[[File:Rpf-raspberry-pi-4-model-b.png|thumb|Raspberry Pi 4 Model B]] | [[File:Rpf-raspberry-pi-4-model-b.png|thumb|Raspberry Pi 4 Model B]] | ||
| − | == | + | == Files == |
| − | |||
| − | + | [https://downloads.massmesh.net/snapshots/images/meshnode/rpi-4/openwrt-massmesh-meshnode-bcm27xx-bcm2711-rpi-4-squashfs-factory.img.gz Mass Mesh Firmware (Factory) (Latest snapshot)] | |
| + | |||
| + | [https://downloads.massmesh.net/snapshots/images/meshnode/rpi-4/openwrt-massmesh-meshnode-bcm27xx-bcm2711-rpi-4-squashfs-sysupgrade.img.gz Mass Mesh Firmware (Sysupgrade) (Latest snapshot)] | ||
| + | |||
| + | [https://downloads.massmesh.net/snapshots/packages/aarch64_cortex-a72/generic/ Mass Mesh Snapshot Package Repository] | ||
| + | |||
| + | [https://downloads.massmesh.net/snapshots/images/meshnode/rpi-4/ Mass Mesh Firmware Snapshot Image Repository] | ||
| + | |||
| + | [https://downloads.openwrt.org/snapshots/targets/bcm27xx/bcm2711/ OpenWrt Snapshot Images Tree] | ||
| + | |||
| + | [https://downloads.openwrt.org/snapshots/targets/bcm27xx/bcm2711/packages/ OpenWrt Snapshot Package Tree] | ||
| + | |||
| + | == Materials & Software == | ||
| + | {{Tip|Download and install the appropriate version of the [https://www.raspberrypi.org/downloads/ Raspberry Pi Imager] for your computer before continuing.}} | ||
| + | <gallery> | ||
| + | File:Rpf-raspberry-pi-4-model-b.png | '''[[RPF Raspberry Pi 4 Model B]]''' | ||
| + | File:MicroSD_card.jpg | '''microSD Card''' (4GB+) | ||
| + | File:Ethernet.jpg | '''Ethernet Cable (1x)''' | ||
| + | File:Usb-reader-writer.png | '''SD Card reader/writer.''' (Some computers come with this built in.) | ||
| + | </gallery> | ||
| + | |||
| + | <section begin=flashpi4 /> | ||
| + | == Flashing the Firmware == | ||
| + | |||
| + | # Download the latest stable version of Mass Mesh's free firmware [https://downloads.massmesh.net/snapshots/images/meshnode/rpi-4/openwrt-massmesh-meshnode-bcm27xx-bcm2711-rpi-4-ext4-sysupgrade.img.gz here] | ||
| + | ## Following along with an '''Espresso Bin v5?''' Download your firmware from [https://downloads.massmesh.net/snapshots/images/meshnode/globalscale_espressobin/openwrt-massmesh-meshnode-mvebu-cortexa53-globalscale_espressobin-squashfs-sdcard.img.gz here] instead! | ||
| + | # Open the Raspberry Pi Imager (Download and install it from [https://www.raspberrypi.org/downloads/ here] if you haven't yet.) | ||
| + | # Select "Choose OS" | ||
| + | ## [[File:RPI_Imager_Main_Screen.png|frameless|Select "Choose OS"]] | ||
| + | # Scroll to the bottom of the list, and select "Use Custom" | ||
| + | ## [[File:RPI_Imager_Use_Custom.png|frameless|Scroll to the bottom of the list, and select "Use Custom"]] | ||
| + | # Find the Mass Mesh firmware you just downloaded, and select it from the filesystem. | ||
| + | # Once you have selected the appropriate firmware, select "Choose SD Card" | ||
| + | ## [[File:RPI_Imager_Main_Screen.png|frameless|Once you have selected the appropriate firmware, select "Choose SD Card"]] | ||
| + | # You should see something like the following. Go ahead and select that card. (You probably only see one, but use the size of the card as a hint if you see several.) | ||
| + | ## [[File:RPI_Imager_Select_SD_Card.png|frameless|Go ahead and select that card. (You probably only see one, but use the size of the card as a hint if you see several.)]] | ||
| + | # Once you have selected the OS and the SD Card, select "Write." You will see a warning like the one shown below... Go ahead and select "Yes." | ||
| + | ## [[File:RPI_Imager_Write.png|frameless|Once you have selected the OS and the SD Card, select "Write."]] | ||
| + | ## [[File:RPI_Imager_Warning.png|frameless|You will see a warning like this... Go ahead and select "Yes."]] | ||
| + | # You should see a screen like the following. Click "Continue," and remove the SD card from your computer. | ||
| + | ## [[File:RPI_Imager_Success.png|frameless|Click "Continue," and remove the SD card from your computer.]] | ||
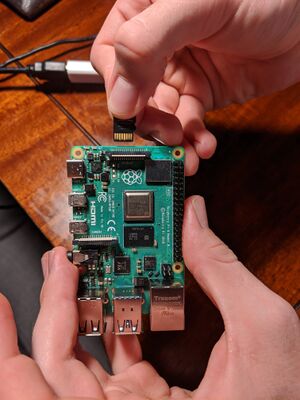
| + | # Plug the micro SD card into your Raspberry Pi 4. | ||
| + | ## Plug in the SD card with the gold side up, like shown here: | ||
| + | ## [[File:Plug_in_sd_rpi.jpeg|frameless|Plug in the SD card with the gold side up]] | ||
| + | <section end=flashpi4 /> | ||
| + | |||
| + | '''Congratulations!!!''' You have successfully prepared your Raspberry Pi 4b to act as a secure mesh node. See the [[Node Setup]] guide for more info about building a wireless mesh node. | ||
Revision as of 08:47, 4 September 2020

Files
Mass Mesh Firmware (Factory) (Latest snapshot)
Mass Mesh Firmware (Sysupgrade) (Latest snapshot)
Mass Mesh Snapshot Package Repository
Mass Mesh Firmware Snapshot Image Repository
Materials & Software
Tip: Download and install the appropriate version of the Raspberry Pi Imager for your computer before continuing.
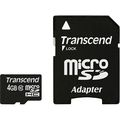
microSD Card (4GB+)
Ethernet Cable (1x)
SD Card reader/writer. (Some computers come with this built in.)


Flashing the Firmware
- Download the latest stable version of Mass Mesh's free firmware here
- Following along with an Espresso Bin v5? Download your firmware from here instead!
- Open the Raspberry Pi Imager (Download and install it from here if you haven't yet.)
- Select "Choose OS"
- Scroll to the bottom of the list, and select "Use Custom"
- Find the Mass Mesh firmware you just downloaded, and select it from the filesystem.
- Once you have selected the appropriate firmware, select "Choose SD Card"
- You should see something like the following. Go ahead and select that card. (You probably only see one, but use the size of the card as a hint if you see several.)
- Once you have selected the OS and the SD Card, select "Write." You will see a warning like the one shown below... Go ahead and select "Yes."
- You should see a screen like the following. Click "Continue," and remove the SD card from your computer.
- Plug the micro SD card into your Raspberry Pi 4.
- Plug in the SD card with the gold side up, like shown here:


Congratulations!!! You have successfully prepared your Raspberry Pi 4b to act as a secure mesh node. See the Node Setup guide for more info about building a wireless mesh node.