Difference between revisions of "Ubiquiti UAP AC Mesh"
| (6 intermediate revisions by 2 users not shown) | |||
| Line 12: | Line 12: | ||
[https://downloads.massmesh.net/snapshots/images/meshradio/ubnt_unifiac-mesh/openwrt-massmesh-meshradio-ath79-generic-ubnt_unifiac-mesh-squashfs-sysupgrade.bin Mass Mesh Firmware (sysupgrade)] | [https://downloads.massmesh.net/snapshots/images/meshradio/ubnt_unifiac-mesh/openwrt-massmesh-meshradio-ath79-generic-ubnt_unifiac-mesh-squashfs-sysupgrade.bin Mass Mesh Firmware (sysupgrade)] | ||
| + | |||
| + | [https://openwrt.org/toh/hwdata/ubiquiti/ubiquiti_unifi_ac_mesh OpenWrt Techdata] | ||
== Flashing == | == Flashing == | ||
| Line 38: | Line 40: | ||
}} | }} | ||
| − | The LED will flash at varying speeds, then it will turn solid when complete. | + | The LED will flash at varying speeds, then it will turn solid when complete. After writing the firmware, the device automatically reboots. This will take a few minutes to complete, and when done the device will be pingeable at 192.168.1.20. |
* The radio will timeout if left in tftp mode for too long. If the transfer is unsuccessful, try power cycling the radio and entering tftp mode again. | * The radio will timeout if left in tftp mode for too long. If the transfer is unsuccessful, try power cycling the radio and entering tftp mode again. | ||
| Line 48: | Line 50: | ||
<ol> | <ol> | ||
<li> | <li> | ||
| − | Download the latest Mass Mesh radio firmware [https://downloads.massmesh.net/snapshots/images/meshradio/ubnt_unifiac-mesh/openwrt-massmesh-meshradio-ath79-generic-ubnt_unifiac-mesh-squashfs-sysupgrade.bin here.] | + | Download the latest Mass Mesh radio firmware [https://downloads.massmesh.net/snapshots/images/meshradio/ubnt_unifiac-mesh/openwrt-21.02.1-massmesh-meshradio-ath79-generic-ubnt_unifiac-mesh-squashfs-sysupgrade.bin here.] |
</li> | </li> | ||
<li>Statically assign your computer the IP address <code>192.168.1.25</code> (See [[#Set Up a Static IP Address]] if needed.)</li> | <li>Statically assign your computer the IP address <code>192.168.1.25</code> (See [[#Set Up a Static IP Address]] if needed.)</li> | ||
| Line 56: | Line 58: | ||
<li>Copy the Mass Mesh firmware onto the device (default password is <code>ubnt</code>): | <li>Copy the Mass Mesh firmware onto the device (default password is <code>ubnt</code>): | ||
<ul> | <ul> | ||
| − | <li> <pre>scp openwrt- | + | <li> <pre>scp openwrt-massmesh-meshradio-ath79-generic-ubnt_unifiac-mesh-squashfs-sysupgrade.bin ubnt@192.168.1.20:/tmp/</pre></li> |
</ul> | </ul> | ||
</li> | </li> | ||
| Line 67: | Line 69: | ||
<ul> | <ul> | ||
<li> | <li> | ||
| − | <pre>BZ.v3.7.40# mtd write /tmp/openwrt- | + | <pre>BZ.v3.7.40# mtd write /tmp/openwrt-massmesh-meshradio-ath79-generic-ubnt_unifiac-mesh-squashfs-sysupgrade.bin kernel0 |
| − | BZ.v3.7.40# mtd -r write /tmp/openwrt- | + | BZ.v3.7.40# mtd -r write /tmp/openwrt-massmesh-meshradio-ath79-generic-ubnt_unifiac-mesh-squashfs-sysupgrade.bin kernel1</pre> |
</li> | </li> | ||
<li>You should see something like the following:</li> | <li>You should see something like the following:</li> | ||
<li> | <li> | ||
| − | <pre>BZ.v3.7.40# mtd write /tmp/openwrt- | + | <pre>BZ.v3.7.40# mtd write /tmp/openwrt-massmesh-meshradio-ath79-generic-ubnt_unifiac-mesh-squashfs-sysupgrade.bin kernel0 |
Unlocking kernel0 ... | Unlocking kernel0 ... | ||
Erasing kernel0 ... | Erasing kernel0 ... | ||
| − | Writing from /tmp/openwrt- | + | Writing from /tmp/openwrt-massmesh-meshradio-ath79-generic-ubnt_unifiac-mesh-squashfs-sysupgrade.bin to kernel0 ... [e/w] |
| − | BZ.v3.7.40# mtd -r write /tmp/openwrt- | + | BZ.v3.7.40# mtd -r write /tmp/openwrt-massmesh-meshradio-ath79-generic-ubnt_unifiac-mesh-squashfs-sysupgrade.bin kernel1 |
Unlocking kernel1 ... | Unlocking kernel1 ... | ||
Erasing kernel1 ... | Erasing kernel1 ... | ||
| − | Writing from /tmp/openwrt- | + | Writing from /tmp/openwrt-massmesh-meshradio-ath79-generic-ubnt_unifiac-mesh-squashfs-sysupgrade.bin to kernel1 ... [e/w]</pre> |
</li> | </li> | ||
</ul> | </ul> | ||
</li> | </li> | ||
| − | <li> | + | <li>If the device does not reboot by itself, type <code>reboot</code> into the terminal, and hit enter. The radio will now restart. Please wait upwards of 5+ minutes during this "first boot" process. When the device is working properly, you should see a wifi network named "MassMesh.org" |
</ol> | </ol> | ||
<section end="flash-uap-ac-mesh" /> | <section end="flash-uap-ac-mesh" /> | ||
Latest revision as of 12:54, 16 January 2022
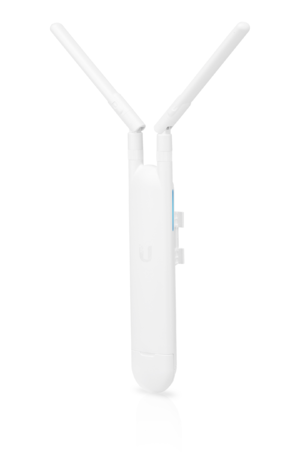
The UAP AC Mesh is an omnidirectional, weather resistant, PoE powered access point. It is useful for short (less than one block,) unplanned links. If you live in an apartment building, this device will connect you with your next-door neighbor through the wall.
Contents
Files
Ubiquiti Firmware (Downgrade to 3.7.xx)
Mass Mesh Firmware (sysupgrade)
Flashing
From OpenWRT
If you're already using OpenWRT, you can use Luci to install the Mass Mesh firmware.
- Download the latest MassMesh sysupgrade firmware.
- Connect to the Nanostation and enter its IP address into your favorite web browser.
- If you are using another version of OpenWrt, please refer to its documentation for details about its IP address.
- Navigate to System → Backup / Flash Firmware → Actions: Flash new firmware image.
- Choose the sysupgrade file previously downloaded and click Flash
- Wait for the device to complete and reboot (This can take up to 5 minutes.)
From Stock Firmware (Ubiquiti AirOS)
If your device shipped with the latest firmware, or if you upgraded to version 3.8.xx.xxxx or higher, you need to downgrade the device before you can flash it due to the mtd utility being missing in later versions. Simply download any 3.7.xx.xxxx firmware image from Ubiquiti Downloads and complete this section before proceeding to #Install the Mass Mesh Firmware.
Enter TFTP Mode
- Unplug the ethernet from the antenna (This turns it off.)
- Use a paper clip to hold in the reset button
- Plug the ethernet back in to the antenna, holding the paperclip steady as you do
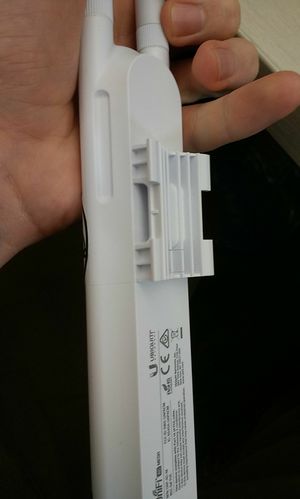
- Continue holding the paper clip until the light on the side of your UAP AC Mesh starts blinking OFF/WHITE/BLUE (should take about 30 seconds)
Set Up a Static IP Address
The next step is to assign your computer a static IP address of 192.168.1.25/24.
- Windows: Setting a static IP address in Windows 10
- Mac: Setting a static IP address in OSX
- Linux: Setting a static IP address in Ubuntu 18.04 desktop
Sending Firmware via TFTP
- Download version 3.7 of Ubiquiti's AirOS
- Rename the firmware file to
firmware.bin, as the device will look for this file name - Launch a command prompt/terminal, and enter the following, one line at a time:
tftp
tftp> connect 192.168.1.20
tftp> binary
tftp> rexmt 1
tftp> timeout 60
tftp> put firmware.bin
Sent x bytes in x seconds
The LED will flash at varying speeds, then it will turn solid when complete. After writing the firmware, the device automatically reboots. This will take a few minutes to complete, and when done the device will be pingeable at 192.168.1.20.
- The radio will timeout if left in tftp mode for too long. If the transfer is unsuccessful, try power cycling the radio and entering tftp mode again.
- If you don't see something like what's shown above (maybe your "Transfer timed out.), go back and make sure that the light on the side of your UAP AC Mesh is blinking in the pattern indicated above. If not, start again from #Enter Factory Reset Mode
- If the light is blinking properly, make sure that your static IP address was assigned properly. If not, start again from #Set Up a Static IP Address
- If you are still having trouble transferring firmware to the device, reach out for help in the chatroom. Someone will help you get unstuck.
Install the Mass Mesh Firmware
- Download the latest Mass Mesh radio firmware here.
- Statically assign your computer the IP address
192.168.1.25(See #Set Up a Static IP Address if needed.) - Open a terminal/command prompt. You will need it in order to copy/paste the commands shown below.
- Copy the Mass Mesh firmware onto the device (default password is
ubnt):-
scp openwrt-massmesh-meshradio-ath79-generic-ubnt_unifiac-mesh-squashfs-sysupgrade.bin ubnt@192.168.1.20:/tmp/
-
- SSH into the device and log in with the default username and password
ubnt / ubntssh ubnt@192.168.1.20
- Then write the firmware to
kernel0andkernel1by entering the following into the terminal, line by line:-
BZ.v3.7.40# mtd write /tmp/openwrt-massmesh-meshradio-ath79-generic-ubnt_unifiac-mesh-squashfs-sysupgrade.bin kernel0
BZ.v3.7.40# mtd -r write /tmp/openwrt-massmesh-meshradio-ath79-generic-ubnt_unifiac-mesh-squashfs-sysupgrade.bin kernel1
- You should see something like the following:
-
BZ.v3.7.40# mtd write /tmp/openwrt-massmesh-meshradio-ath79-generic-ubnt_unifiac-mesh-squashfs-sysupgrade.bin kernel0
Unlocking kernel0 ...
Erasing kernel0 ...
Writing from /tmp/openwrt-massmesh-meshradio-ath79-generic-ubnt_unifiac-mesh-squashfs-sysupgrade.bin to kernel0 ...  [e/w]

BZ.v3.7.40# mtd -r write /tmp/openwrt-massmesh-meshradio-ath79-generic-ubnt_unifiac-mesh-squashfs-sysupgrade.bin kernel1
Unlocking kernel1 ...
Erasing kernel1 ...
Writing from /tmp/openwrt-massmesh-meshradio-ath79-generic-ubnt_unifiac-mesh-squashfs-sysupgrade.bin to kernel1 ...  [e/w]
-
- If the device does not reboot by itself, type
rebootinto the terminal, and hit enter. The radio will now restart. Please wait upwards of 5+ minutes during this "first boot" process. When the device is working properly, you should see a wifi network named "MassMesh.org"

