Difference between revisions of "Host A Public Access Point"
(Added materials section.) |
(Fill in "flash firmware" section.) |
||
| (One intermediate revision by the same user not shown) | |||
| Line 1: | Line 1: | ||
| − | One of the best ways to help the Mesh is to host a [https://en.wikipedia.org/wiki/Wireless_access_point public access point (AP.)] | + | * '''Time:''' about 2 hours |
| + | * '''Cost:''' about $150 | ||
| + | |||
| + | One of the best ways to help the Mesh is to host a [https://en.wikipedia.org/wiki/Wireless_access_point public access point (AP.)] In these instructions, we will cover how to deploy an AP that is privacy-enabled by default, and allow users to connect to [https://yggdrasil-network.github.io/services.html in-mesh services.] Public APs show our technology working in the real world while sharing a secure Internet connection as a public good. If you're interested in hosting a public access point or want to learn more before starting this tutorial, please join our [https://matrix.to/#/!ZYBgkNycKPyEFLAwHK:matrix.org?via=matrix.org Mass Mesh AP Hosts] chat room. | ||
| + | |||
| + | Setting up a public AP is one of the easiest ways to connect your home and your neighbors to the mesh. The whole setup process takes about 2 hours from start to finish. The necessary hardware is listed below, and instructions for everything from flashing the firmware to placing the mesh point are covered. | ||
| + | |||
| + | {{Note|Set yourself up for success, and '''join the Mass Mesh AP Hosts chat room before you begin.''' Something will go wrong during the setup process, and it's best to have experienced friends ready to help when it does.}} | ||
| − | |||
=== Materials === | === Materials === | ||
<gallery> | <gallery> | ||
| Line 12: | Line 18: | ||
</gallery> | </gallery> | ||
| + | === Install Mass Mesh Firmware === | ||
| + | Each device has its own install process. Please follow the specific device instructions for each, and come back to this page. | ||
| + | |||
| + | # [[RPF Raspberry Pi 4 Model B]] | ||
| + | # [[Ubiquiti UAP AC Mesh]] | ||
| − | == | + | === Wire Up The Access Point === |
| + | Once you've flashed all the devices, connect them according to these pictures.... (TODO: Insert pictures here) | ||
Latest revision as of 09:55, 30 November 2019
- Time: about 2 hours
- Cost: about $150
One of the best ways to help the Mesh is to host a public access point (AP.) In these instructions, we will cover how to deploy an AP that is privacy-enabled by default, and allow users to connect to in-mesh services. Public APs show our technology working in the real world while sharing a secure Internet connection as a public good. If you're interested in hosting a public access point or want to learn more before starting this tutorial, please join our Mass Mesh AP Hosts chat room.
Setting up a public AP is one of the easiest ways to connect your home and your neighbors to the mesh. The whole setup process takes about 2 hours from start to finish. The necessary hardware is listed below, and instructions for everything from flashing the firmware to placing the mesh point are covered.
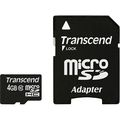
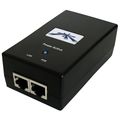
Materials
Install Mass Mesh Firmware
Each device has its own install process. Please follow the specific device instructions for each, and come back to this page.
Wire Up The Access Point
Once you've flashed all the devices, connect them according to these pictures.... (TODO: Insert pictures here)


