Difference between revisions of "RPF Raspberry Pi 4 Model B"
Jump to navigation
Jump to search
(Add materials and files sections) |
(Fill in instructions for flashing.) |
||
| Line 17: | Line 17: | ||
* One or more [https://www.amazon.com/AmazonBasics-Gigabit-Ethernet-Internet-Adapter/dp/B00M77HMU0?psc=1&SubscriptionId=AKIAILSHYYTFIVPWUY6Q&tag=duckduckgo-ffab-20&linkCode=xm2&camp=2025&creative=165953&creativeASIN=B00M77HMU0 USB -> Ethernet adapter(s)] | * One or more [https://www.amazon.com/AmazonBasics-Gigabit-Ethernet-Internet-Adapter/dp/B00M77HMU0?psc=1&SubscriptionId=AKIAILSHYYTFIVPWUY6Q&tag=duckduckgo-ffab-20&linkCode=xm2&camp=2025&creative=165953&creativeASIN=B00M77HMU0 USB -> Ethernet adapter(s)] | ||
| − | == | + | == Instructions == |
| − | + | #Download the "[https://github.com/MassMesh/meta-imagebuilder-artifacts/blob/master/massmesh/meshnode/rpi-4/openwrt-massmesh-meshnode-brcm2708-bcm2711-rpi-4-squashfs-sysupgrade.img.gz Sysupgrade]" file from the Files section. | |
| − | + | #Flash the firmware onto your microSD card using [https://www.balena.io/etcher/ Balena Etcher], or a similar tool. | |
| − | + | ##For help with this step, see [[Flashing Removable Media]]. | |
| − | + | # Insert the microSD card and connect the Raspberry Pi to power. | |
| − | |||
Revision as of 17:14, 24 November 2019
Files
Mass Mesh Firmware (Factory) (Latest)
Mass Mesh Firmware (Sysupgrade) (Latest)
Mass Mesh Firmware Build Artifacts
Materials
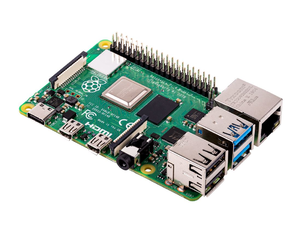
- One Raspberry Pi 4 Model B
- The official power supply is not required, but strongly recommended.
- You may choose any memory size option. 1GB is sufficient.
- One 4GB+ microSD card
- One or more USB -> Ethernet adapter(s)
Instructions
- Download the "Sysupgrade" file from the Files section.
- Flash the firmware onto your microSD card using Balena Etcher, or a similar tool.
- For help with this step, see Flashing Removable Media.
- Insert the microSD card and connect the Raspberry Pi to power.
