Difference between revisions of "Globalscale ESPRESSObin v5"
(Add link to case STL file.) |
Stephen304 (talk | contribs) |
||
| Line 1: | Line 1: | ||
| + | [[Category:Devices]] | ||
[[Category:Globalscale]] | [[Category:Globalscale]] | ||
[[File:Espressobin_v5.png|thumb|ESPRESSObin v5]] | [[File:Espressobin_v5.png|thumb|ESPRESSObin v5]] | ||
Revision as of 19:23, 4 January 2020
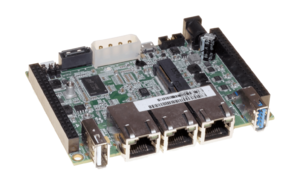
The ESPRESSObin v5 is a small single board computer similar to a raspberry pi. It has 3 ethernet ports, a USB 3.0 port, as well as an internal mPCIe slot.
Files
MassMesh MeshNode Firmware (Latest)
Build The Image
Use profile meshnode and device globalscale_espressobin and see Building the Firmware for instructions on using the ImageBuilder.
Modify U-Boot Variables
Before the ESPRESSObin will boot our Open WRT image from an SD card, we will need to modify just a few U-Boot variables. More information about this can be found in this commit message and these docs.
In order to connect to your modify ESPRESSObin's U-Boot variables, you'll need to establish a serial connection.
Once you've established a serial connection, change the bootcmd variable using the following command:
setenv bootcmd 'mmc dev 0; ext4load mmc 0:1 $kernel_addr $image_name;ext4load mmc 0:1 $fdt_addr $fdt_name;setenv bootargs $console root=/dev/mmcblk0p1 rw rootwait; booti $kernel_addr - $fdt_addr'
Now, save your changes.
saveenv
Flashing
The Espressobin uses a removable microSD card for storage, which makes it easy to load custom firmware onto it. Build or download a firmware from the Files section of this page and acquire a microSD card at least 2GB in size. Then refer to the Flashing Removable Media page to learn how to write the firmware to the card.
When this has been completed, you will be able to insert the microSD card into the ESPRESSObin and connect it to power. It should boot into the custom firmware.
