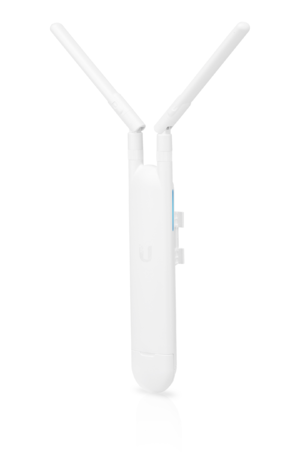
Ubiquiti UAP AC Mesh
The UAP AC Mesh is a PoE powered access point that is weather resistant and omnidirectional.
Downgrading
If your device shipped with the latest firmware, or if you upgraded beyond version 3.7.xx.xxxx, you may need to downgrade the device before you can flash it due to the mtd utility being missing in later versions. Simply download an older firmware image from the Ubiquiti Downloads Page and proceed with the recovery instructions.
Flashing
In the stock firmware, the access point will have the default user/pass ubnt / ubnt. If there is no DHCP server, it will assign itself the IP address 192.168.1.20.
- Statically assign your computer the IP address
192.168.1.25 - Power on the device and plug it into your computer's ethernet port
- Copy the firmware you want to flash to the device:
- SSH into the device and log in with the default username and password
ubnt / ubnt - Then write the firmware to
kernel0andkernel1
scp openwrt-ar71xx-generic-ubnt-unifiac-lite-squashfs-sysupgrade.bin ubnt@192.168.1.20:/tmp/
ssh ubnt@192.168.1.20
BZ.v3.7.40# mtd write /tmp/openwrt-ar71xx-generic-ubnt-unifiac-lite-squashfs-sysupgrade.bin kernel0
Unlocking kernel0 ...
Erasing kernel0 ...
Writing from /tmp/openwrt-ar71xx-generic-ubnt-unifiac-lite-squashfs-sysupgrade.bin to kernel0 ...  [e/w]

BZ.v3.7.40# mtd -r write /tmp/openwrt-ar71xx-generic-ubnt-unifiac-lite-squashfs-sysupgrade.bin kernel1
Unlocking kernel1 ...
Erasing kernel1 ...
Writing from /tmp/openwrt-ar71xx-generic-ubnt-unifiac-lite-squashfs-sysupgrade.bin to kernel1 ...  [e/w]
Recovery
To recover the UAP AC Mesh from a bad flash, or to upgrade or downgrade the stock firmware, you will need to put the device in recovery mode and send a stock firmware using TFTP.
- Obtain a stock firmware to flash from the Ubiquiti Downloads Page -
3.7.xx.xxxxis recommended if you wish to flash something else afterwards - Rename the firmware file to
firmware.bin, as the device will look for this file name - To enter recovery mode, hold the reset button located next to the ethernet port while plugging in the power. Hold the reset button until the side LED alternates orange, blue, off.
- Assign your computer a static IP such as
192.168.1.25, with net mask of255.255.255.0or/24 - Connect your computer's ethernet port to the device
- Run TFTP and enter the following commands:
tftp> connect 192.168.1.20
tftp> binary
tftp> rexmt 1
tftp> timeout 60
tftp> put firmware.bin
Sent x bytes in x seconds
The LED will flash at varying speeds, then it will turn solid when complete.
