Node Setup
.jpeg)
.jpeg)
In these instructions, we will cover how to deploy a mesh node that is privacy-enabled by default, and allows you to share an Internet connection with your neighbors. The whole setup process takes about 2 hours from start to finish. The necessary hardware is listed below, and instructions for everything from flashing the firmware to placing the antenna are covered.
Contents
Preparation
Definitions
- Mesh Node: A mesh node is the smallest unit on a mesh network. Every mesh node is a router, and is critical for delivering the online traffic of its neighbors. For more details about how mesh networks and neighborhood networks work internally, please see the Network Architecture page.
- Firmware: Firmware is the first thing that you will install on your mesh node. Firmware is just like the operating system on your computer (Linux, Windows, Mac, etc.) Firmware is what allows us to install applications, manage users, and all the other things you can do on a functioning computer. The firmware that we use on our network is a customized version of OpenWrt.
- Antenna/Radio: The antenna (or radio) is what allows your mesh node to communicate with other mesh nodes. Our antennas communicate in free spectrum at 2.4Ghz and 5Ghz -- just like the wi-fi in your home or workplace.
- Router: A router is any computer that is responsible for "routing" information on a network. All the mesh nodes on our network can also be called routers.
- Gateway: A gateway or gateway server is a computer (usually a big one) that acts as a bridge between two networks. In order to provide a high level of security on our network, all of our mesh nodes reach the Internet through a gateway server. For more details about how mesh networks and neighborhood networks work internally, please see the Network Architecture page.
Considerations
- Time: about 2 hours
- Cost: about $150
- Internet Access: If you do not already have Internet access, you will need to find a neighbor (on your same street) who is willing to set up a mesh node at their home too, and work out a deal to share their Internet connection fairly.
- Difficulty: The instructions contained on this website are quite technical, and may be incomplete in some places. Most of these instructions were written with Linux users in mind. If you are using another operating system (like Windows or Mac,) some "googling" may be necessary to get through them. As stated above, it's good to have friends. Introduce yourself in any of our chat channels if you want some help getting started!
Materials
Standard Mesh Node
To set up a standard mesh node that broadcasts a secure Internet connection in all directions, you will need to obtain the following equipment:
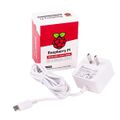
Official Raspberry Pi 4 Power Supply
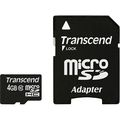
microSD Card (4GB+)
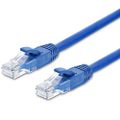
Ethernet Cable (3x) (Three sections, cut to length)
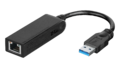
USB to Ethernet Adapter (See USB Ethernet Adapters for buying options.)
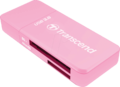
SD Card reader/writer. (Some computers come with this built in.)


PoE Injector (One should come with the UAP AC Mesh if you buy it new)
One Paperclip (Seriously, these come in handy)


Custom Mesh Nodes
If you know what kind of hardware you want, and this 'aint it, please see the recommended Hardware Bundles, or browse the full list of Devices.
The steps to get a mesh node up and running are as follows:
- Flash the firmware on your mesh node (Raspberry Pi 4 is recommended)
- Flash the firmware on your mesh radio (UAP AC Mesh is recommended in most cases)
- Assemble the wireless mesh node
- Configure a secure Internet gateway connection
Install the Mesh Node Firmware
Materials & Software
microSD Card (4GB+)
Ethernet Cable (1x)
SD Card reader/writer. (Some computers come with this built in.)
Flashing the Firmware
- Download the latest stable version of Mass Mesh's free firmware here
- Following along with an Espresso Bin v5? Download your firmware from here instead!
- Open the Raspberry Pi Imager (Download and install it from here if you haven't yet.)
- Select "Choose OS"
- Scroll to the bottom of the list, and select "Use Custom"
- Find the Mass Mesh firmware you just downloaded, and select it from the filesystem.
- Once you have selected the appropriate firmware, select "Choose SD Card"
- You should see something like the following. Go ahead and select that card. (You probably only see one, but use the size of the card as a hint if you see several.)
- Once you have selected the OS and the SD Card, select "Write." You will see a warning like the one shown below... Go ahead and select "Yes."
- You should see a screen like the following. Click "Continue," and remove the SD card from your computer.
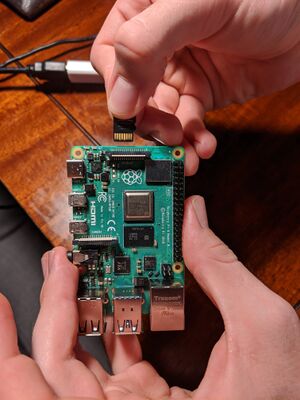
- Plug the micro SD card into your Raspberry Pi 4.
- Plug in the SD card with the gold side up, like shown here:


Congratulations!!! You have successfully prepared your Raspberry Pi 4b to act as a secure mesh node. Set it aside for now while we prepare the other hardware. We will assemble it at the end in #Assembly.
Troubleshooting/Progress Check
To troubleshoot the install so far, please follow the Mesh Node Troubleshooting guide. That guide will cover how to connect your laptop directly to the mesh node and make sure everything is set up as it should be. This can be helpful on your first install, or when you suspect the antenna (not set up yet) to be causing issues.
Install the Mesh Radio Firmware
The steps to install firmware on the antenna are a bit different than they were for the Raspberry Pi. For one thing, the antenna does not have an SD card. So, we will have to install the firmware by connecting to the antenna with our laptop. Please see page 6 of the "Node Installation Guide" for instructions on plugging in the antenna. After you have followed the instructions there, connect your computer to the port marked "LAN" on your PoE injector. We are now ready to begin installing the firmware.
Materials
Ethernet Cable (2x)
PoE Injector (One should come with the UAP AC Mesh if you buy it new)
One Paperclip (Seriously, these come in handy)
Flashing the Firmware
Enter Factory Reset Mode
- Unplug the ethernet from the antenna (This turns it off.)
- Use a paper clip to hold in the reset button
- Plug the ethernet back in to the antenna, holding the paperclip steady as you do
- Continue holding the paper clip until the light on the side of your UAP AC Mesh starts blinking OFF/WHITE/BLUE (should take about 30 seconds)
Set Up a Static IP Address
The next step is to assign your computer a static IP address of 192.168.1.25/24
- Windows: Setting a static IP address in Windows 10
- Mac: Setting a static IP address in OSX
- Linux: Setting a static IP address in Ubuntu 18.04 desktop
Downgrade Ubiquiti AirOS
Because we are "jailbreaking" the Ubiquiti router, we have to downgrade to an older version of their proprietary firmware first. Using a tool called TFTP, we can do this quite simply.
- Download version 3.7 of Ubiquiti's AirOS
- Rename the firmware file to
firmware.bin, as the device will look for this file name - Launch a command prompt/terminal, and enter the following, one line at a time:
tftp
tftp> connect 192.168.1.20
tftp> binary
tftp> rexmt 1
tftp> timeout 60
tftp> put firmware.bin
Sent x bytes in x seconds
The LED will flash at varying speeds, then it will turn solid when complete.
- If you don't see something like what's shown above (maybe your "Transfer timed out.), go back and make sure that the light on the side of your UAP AC Mesh is blinking in the pattern indicated above. If not, start again from #Enter Factory Reset Mode
- If the light is blinking properly, make sure that your static IP address was assigned properly. If not, start again from #Set Up a Static IP Address
- If you are still having trouble transferring firmware to the device, reach out for help in the chatroom. Someone will help you get unstuck.
Install the Mass Mesh Firmware
- Download the latest Mass Mesh radio firmware here.
- Statically assign your computer the IP address
192.168.1.25(See #Set Up a Static IP Address if needed.) - Open a terminal/command prompt. You will need it in order to copy/paste the commands shown below.
- Copy the Mass Mesh firmware onto the device:
-
scp openwrt-ar71xx-generic-ubnt-unifiac-lite-squashfs-sysupgrade.bin ubnt@192.168.1.20:/tmp/
-
- SSH into the device and log in with the default username and password
ubnt / ubntssh ubnt@192.168.1.20
- Then write the firmware to
kernel0andkernel1by entering the following into the terminal, line by line:-
BZ.v3.7.40# mtd write /tmp/openwrt-ar71xx-generic-ubnt-unifiac-lite-squashfs-sysupgrade.bin kernel0
BZ.v3.7.40# mtd -r write /tmp/openwrt-ar71xx-generic-ubnt-unifiac-lite-squashfs-sysupgrade.bin kernel1
- You should see something like the following:
-
BZ.v3.7.40# mtd write /tmp/openwrt-ar71xx-generic-ubnt-unifiac-lite-squashfs-sysupgrade.bin kernel0
Unlocking kernel0 ...
Erasing kernel0 ...
Writing from /tmp/openwrt-ar71xx-generic-ubnt-unifiac-lite-squashfs-sysupgrade.bin to kernel0 ...  [e/w]

BZ.v3.7.40# mtd -r write /tmp/openwrt-ar71xx-generic-ubnt-unifiac-lite-squashfs-sysupgrade.bin kernel1
Unlocking kernel1 ...
Erasing kernel1 ...
Writing from /tmp/openwrt-ar71xx-generic-ubnt-unifiac-lite-squashfs-sysupgrade.bin to kernel1 ...  [e/w]
-
- Type
rebootinto the terminal, and hit enter. The radio will now restart. Please wait upwards of 5+ minutes during this "first boot" process. When the device is working properly, you should see a wifi network named "MassMesh.org"
Congratulations! You have now installed all the firmware you need. Set the radio aside, and pick up in #Assembly
Assembly
To assemble your mesh node, please follow this PDF guide. It can be downloaded for your convenience.
File:New Node Install Guide.pdf
Next Steps
Once you have followed the First Time Setup guide, you can continue to the steps below. This is necessary to securely connect your mesh node to the Internet. For more information about how the mesh network(s) work, see Network Architecture.
Connecting to an Internet Gateway
Mass Mesh runs a public Internet Gateway at the address 200:83a1:3b1a:e7af:4b46:6169:8435:9280. If you would like to use it to connect to the internet, put that address in the autoygg gateway field and click SAVE & APPLY:

At this point, the Status page will show you are not connected:

Before you can connect to the internet via the Mass Mesh gateway, one of our volunteers will need to add your node to the accesslist on the gateway server. You can request this in the Mass Mesh AP Hosts chat room. Please provide your Yggdrasil IPv6 address when you do so, which is available on the Yggdrasil node status page:

Once your node is added to our accesslist, you can hit the Connect button and if that goes well, the status page will look similar to this:
